Running Protocols
Select, validate and run a protocol on the device.
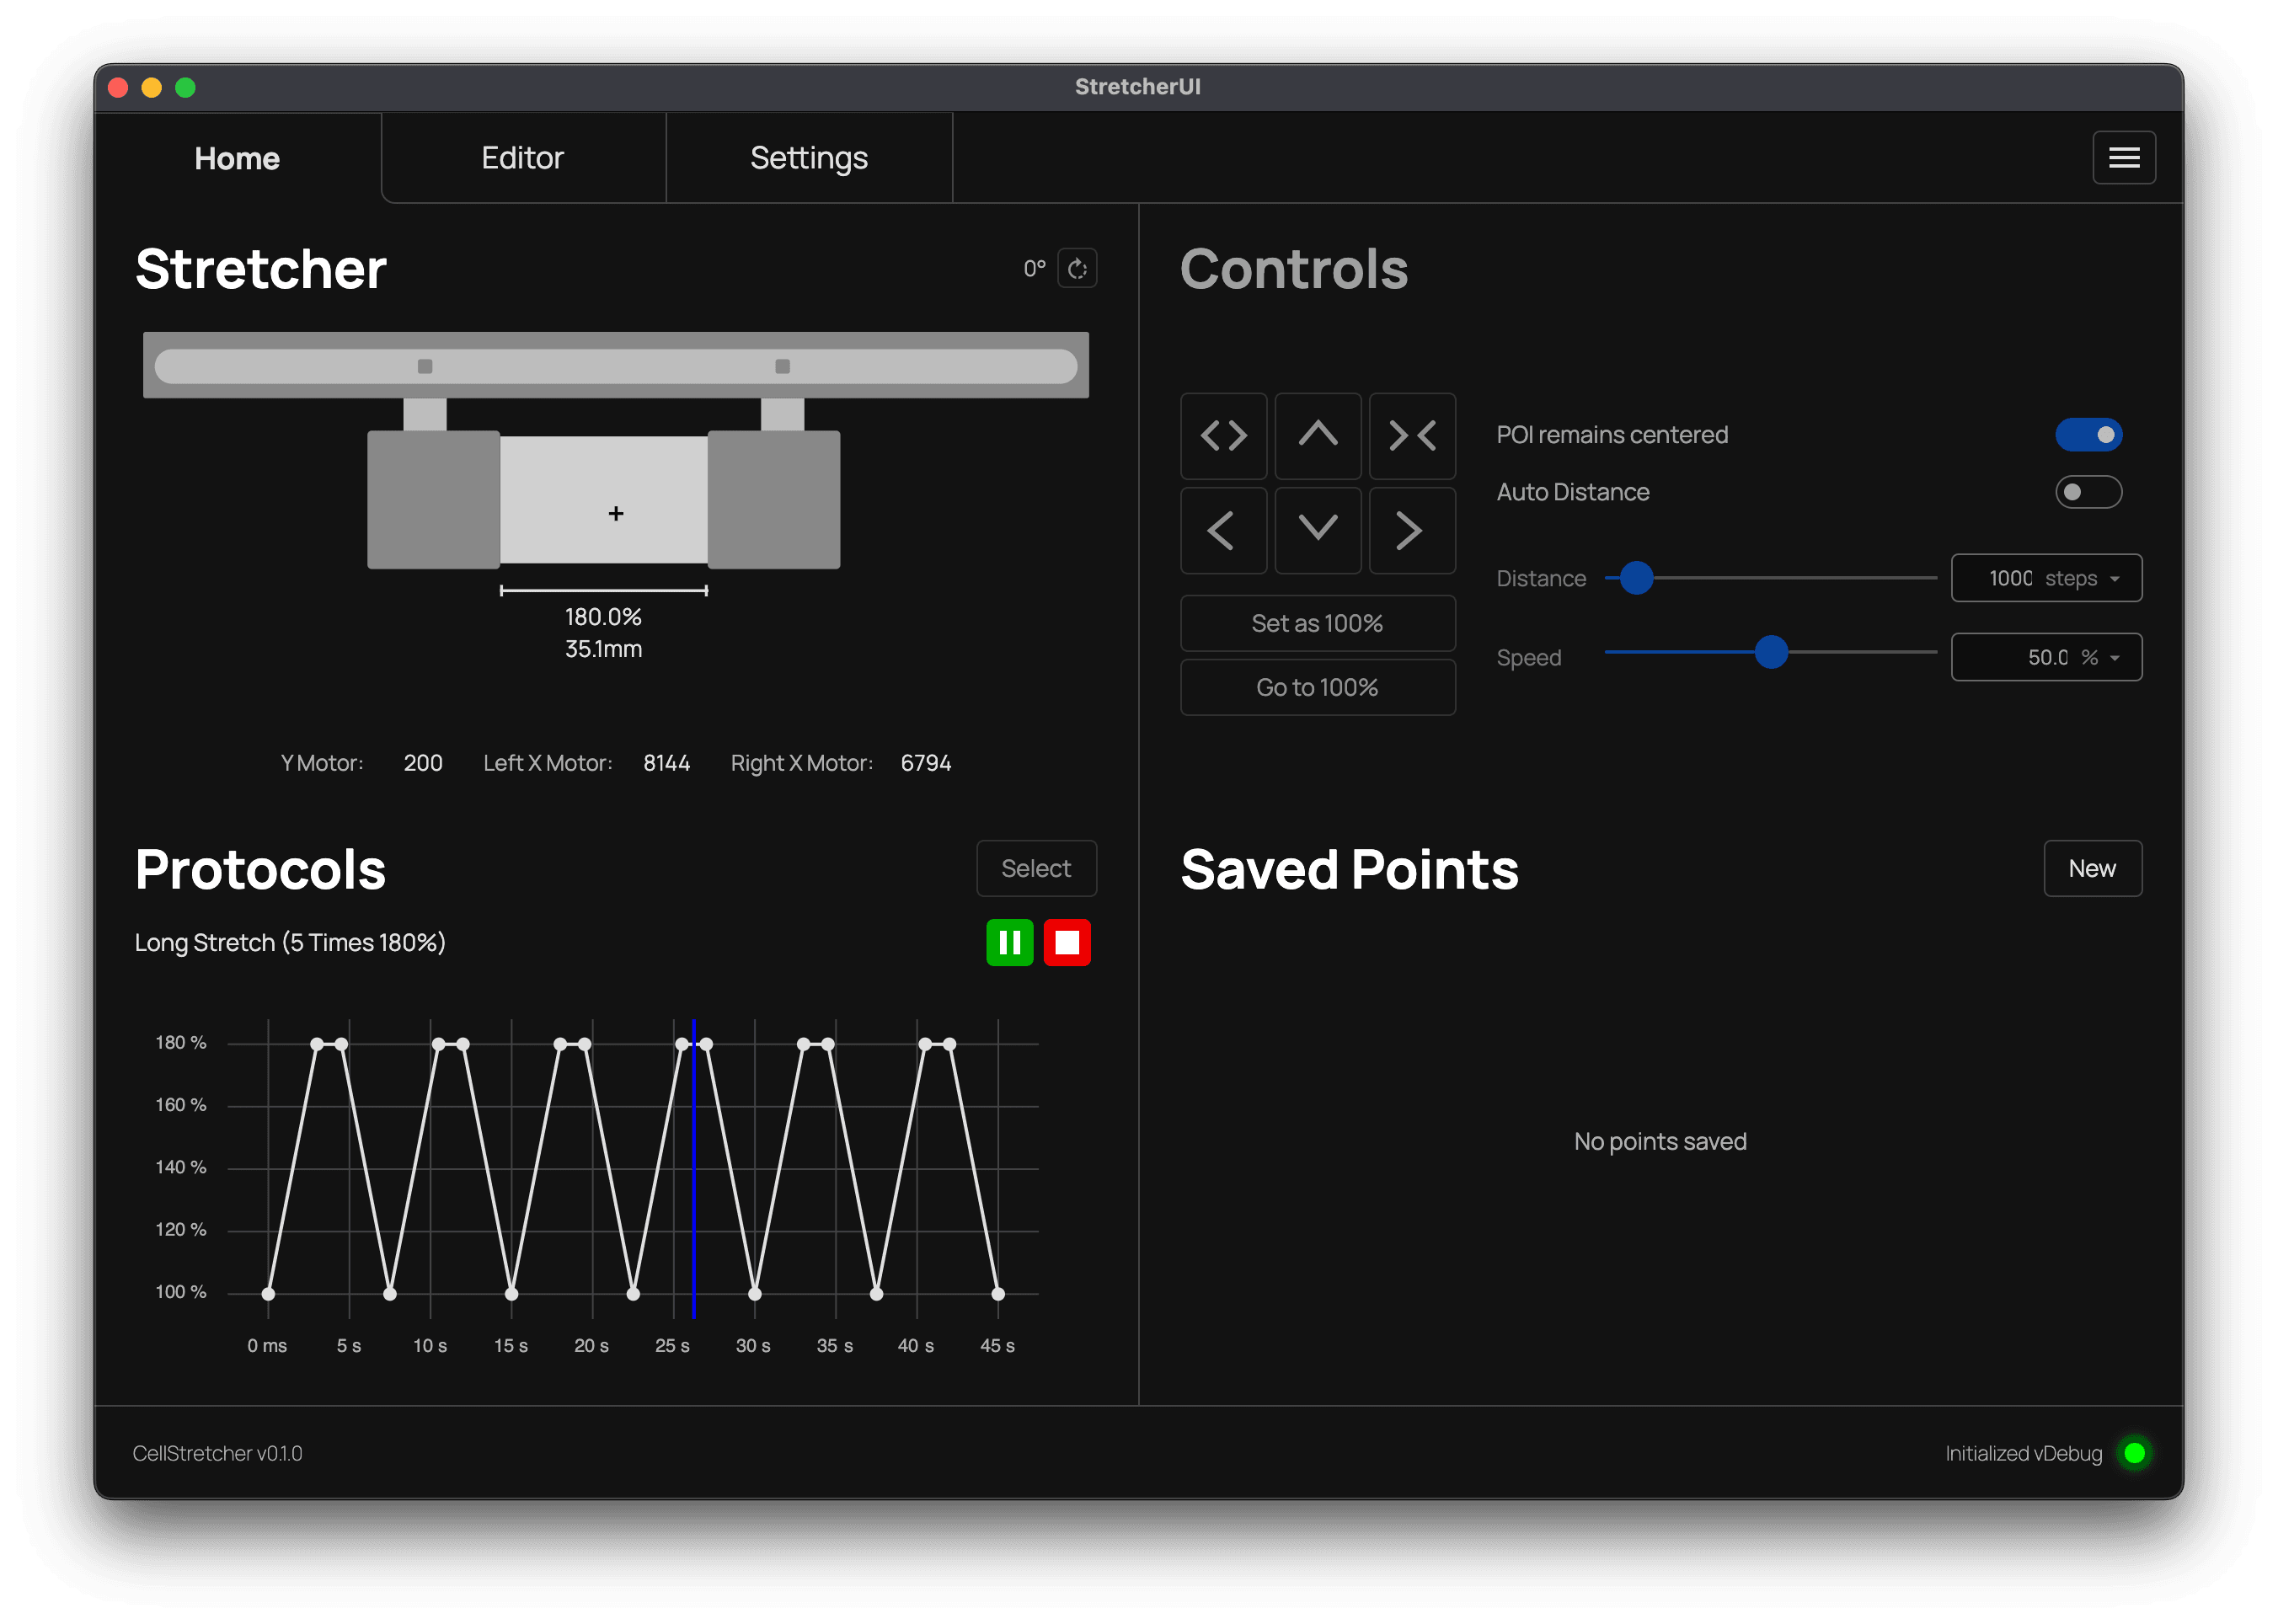
Once you have created or imported a protocol in the StretcherUI, it becomes available on the home tab where you can execute it.
Selecting a protocol
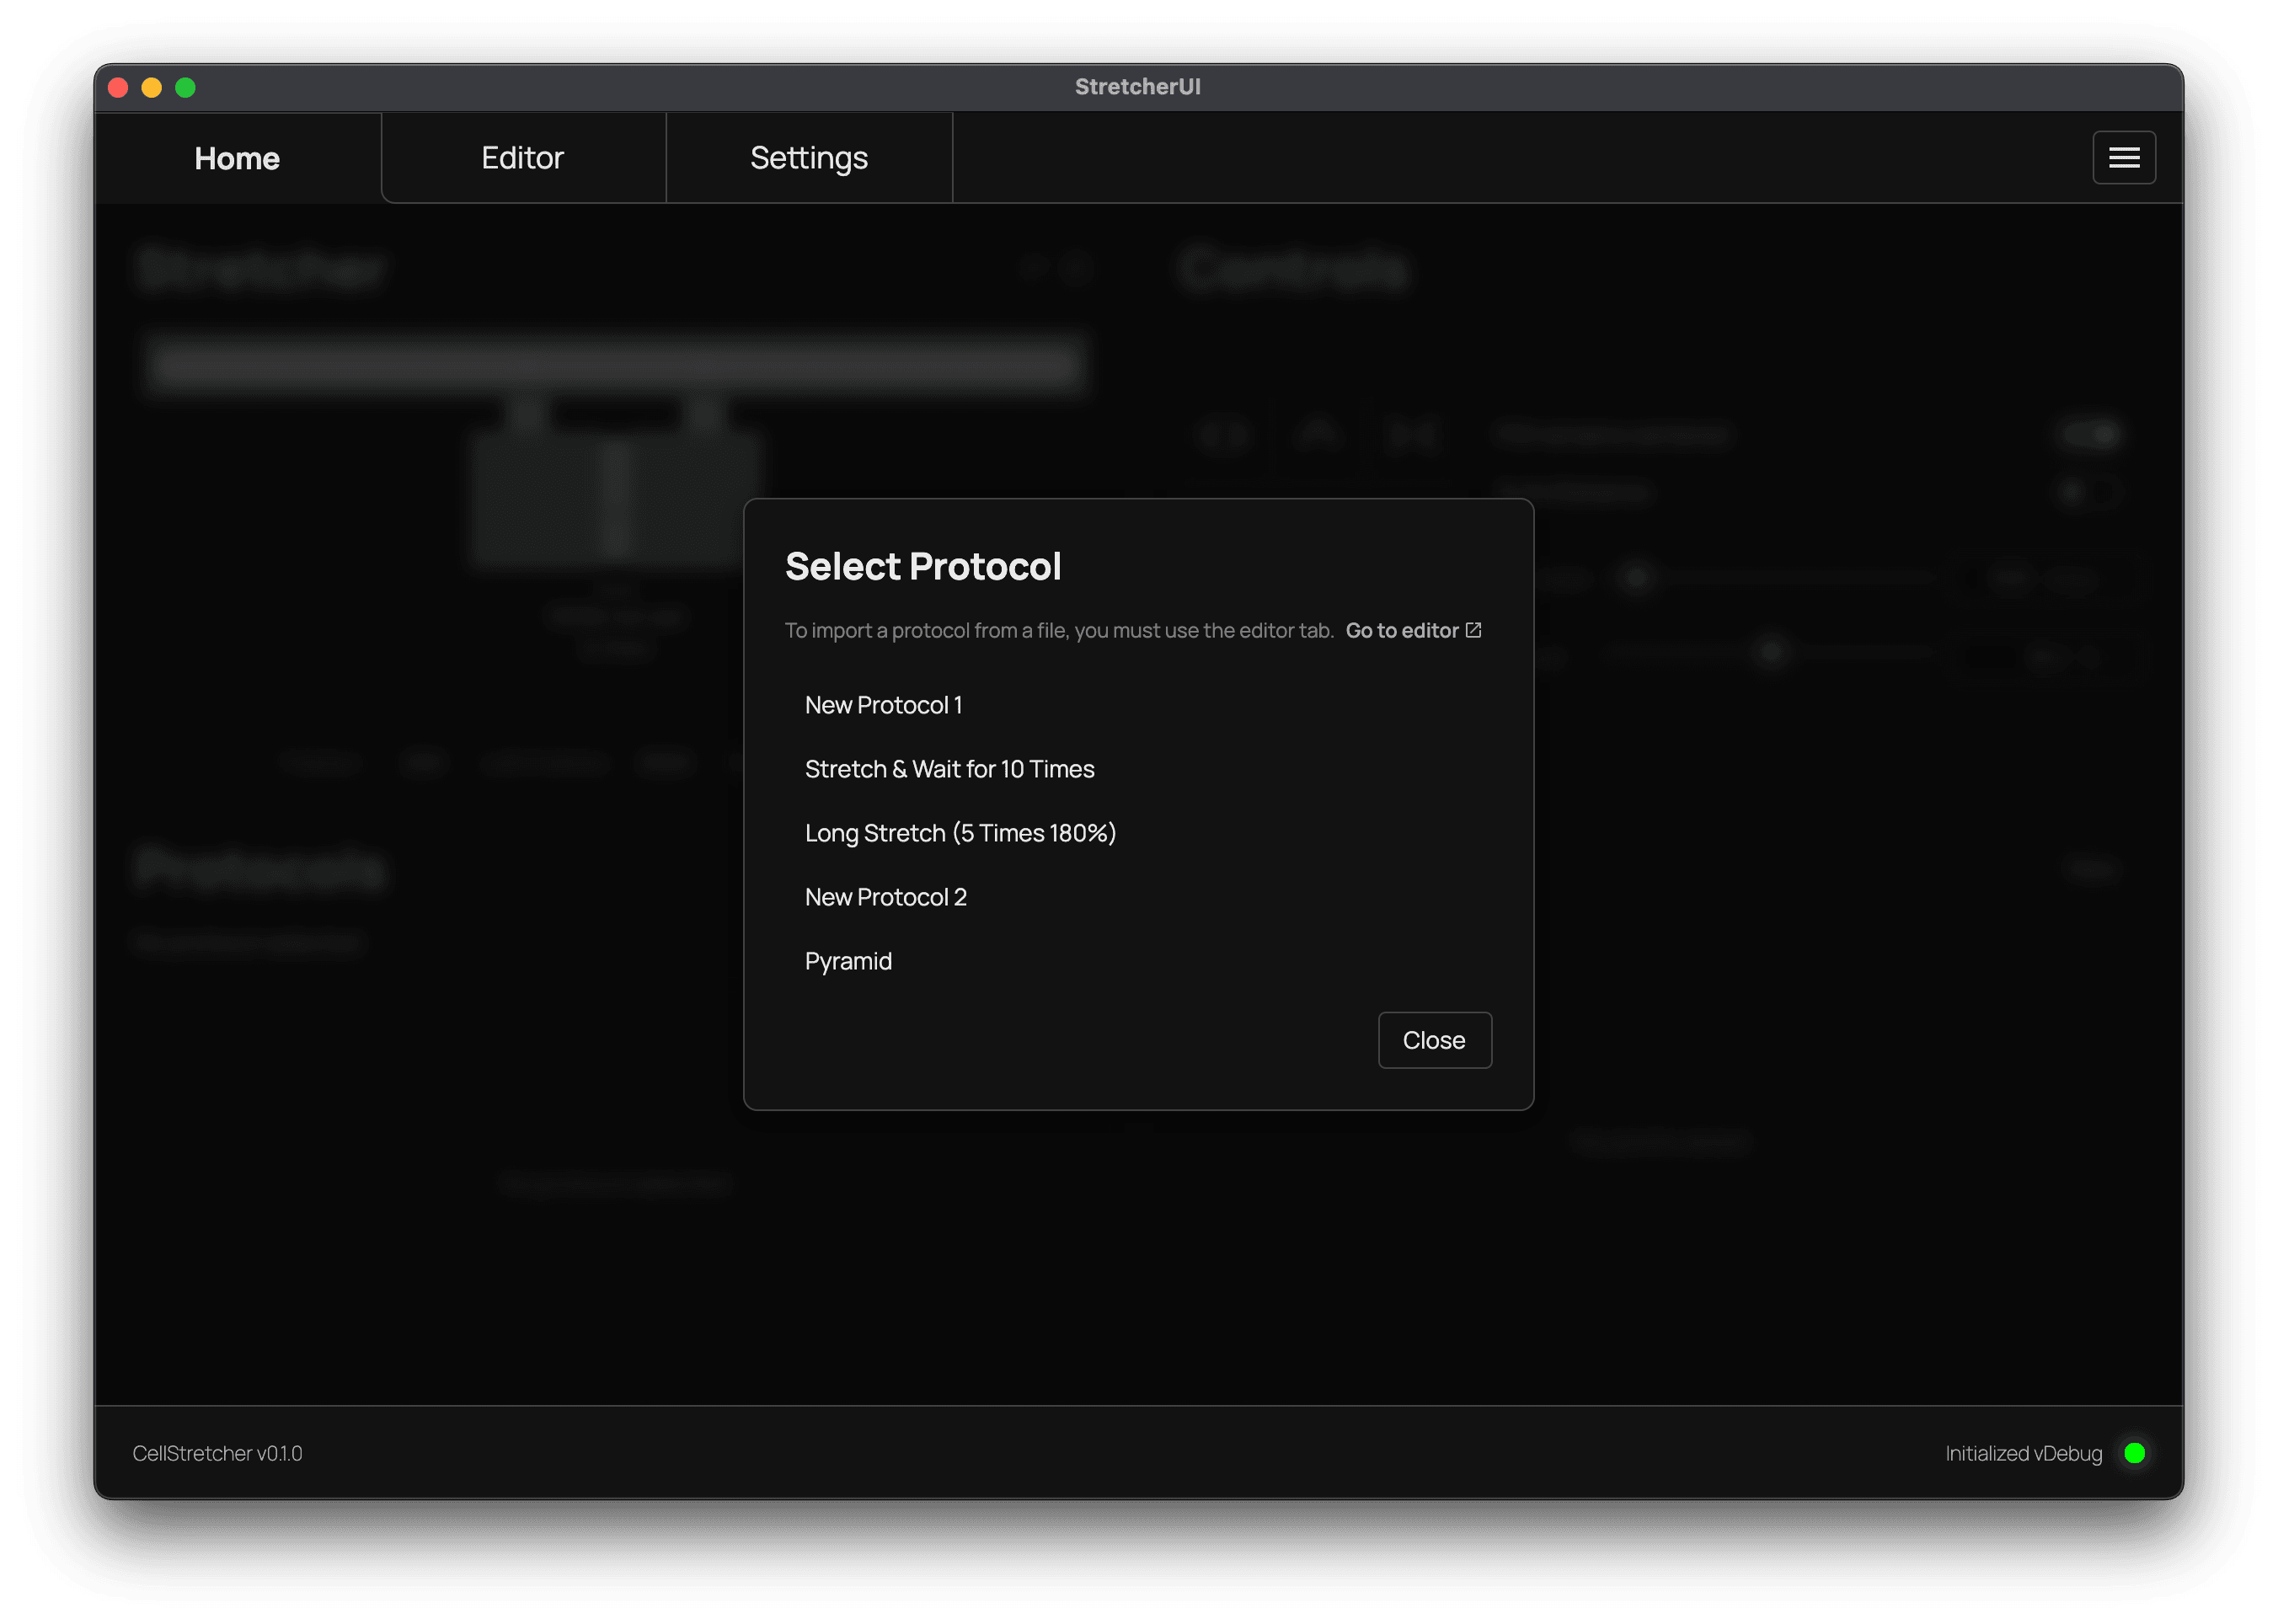
To get started, press the "Select" button and choose the protocol you want to execute.
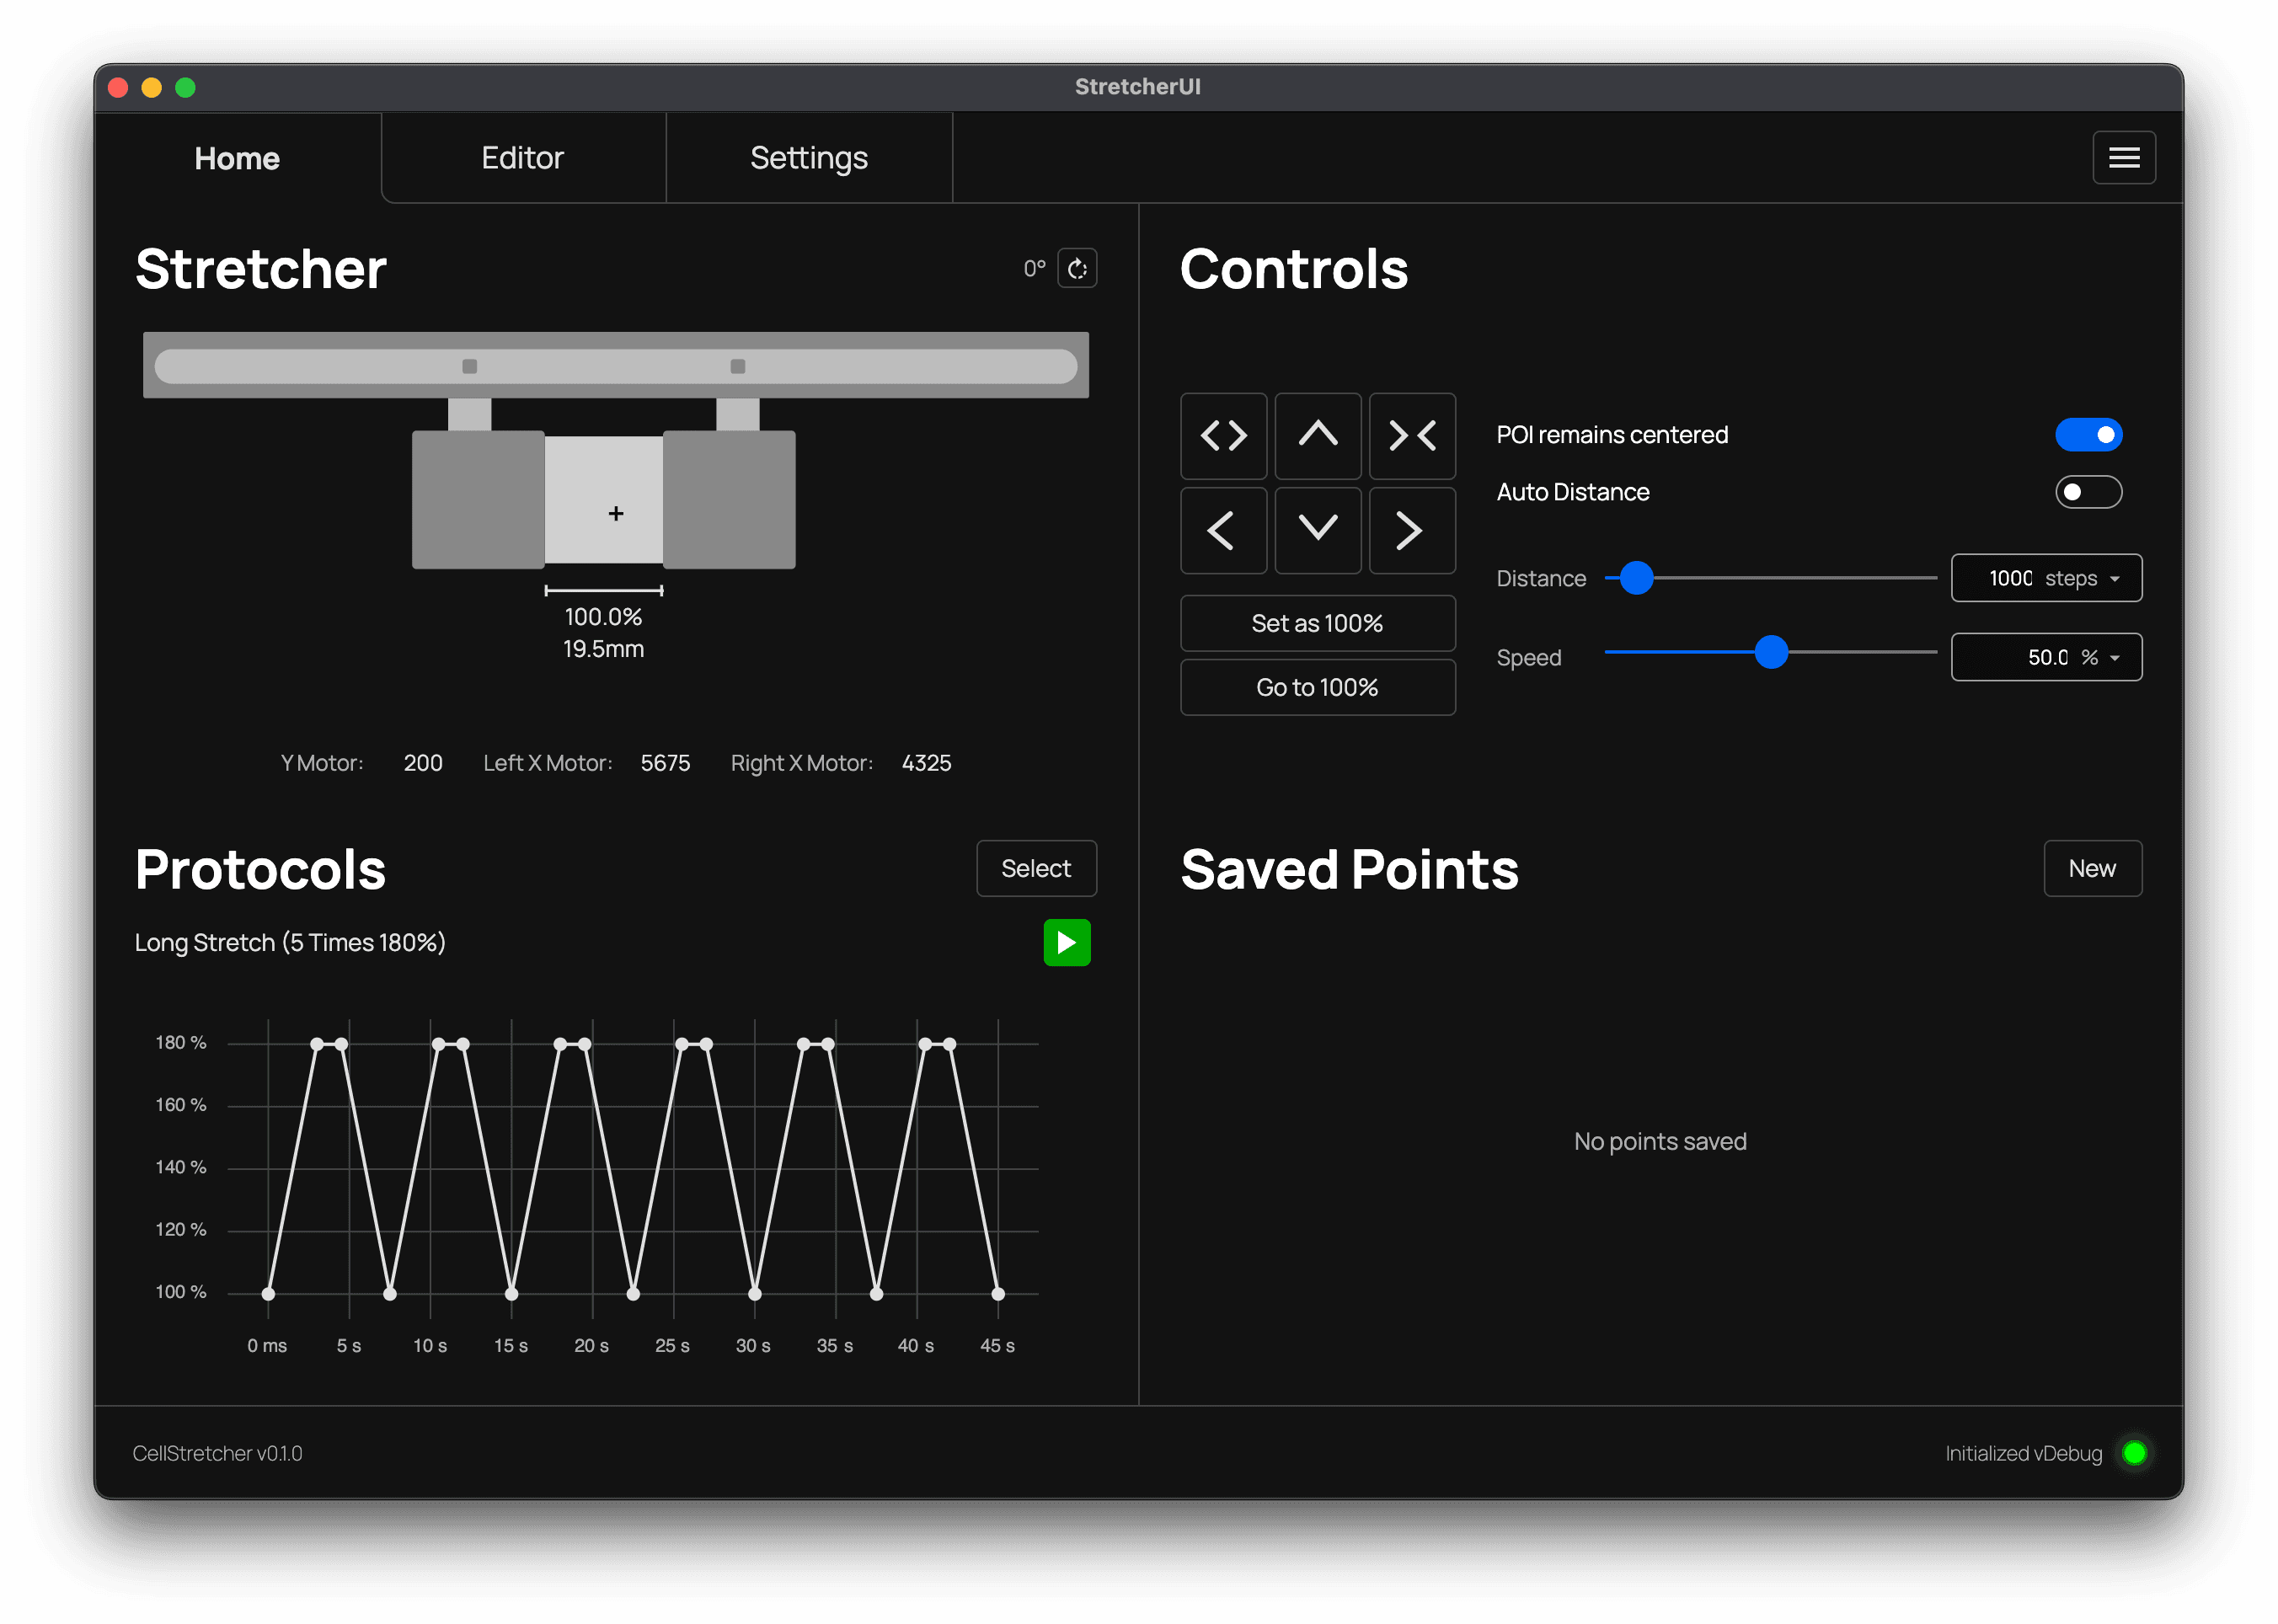
After selecting a protocol, you will see the populated preview graph along with the name of the loaded protocol. This confirms that the protocol is selected and that you can continue to validating and executing it.
Validating the protocol
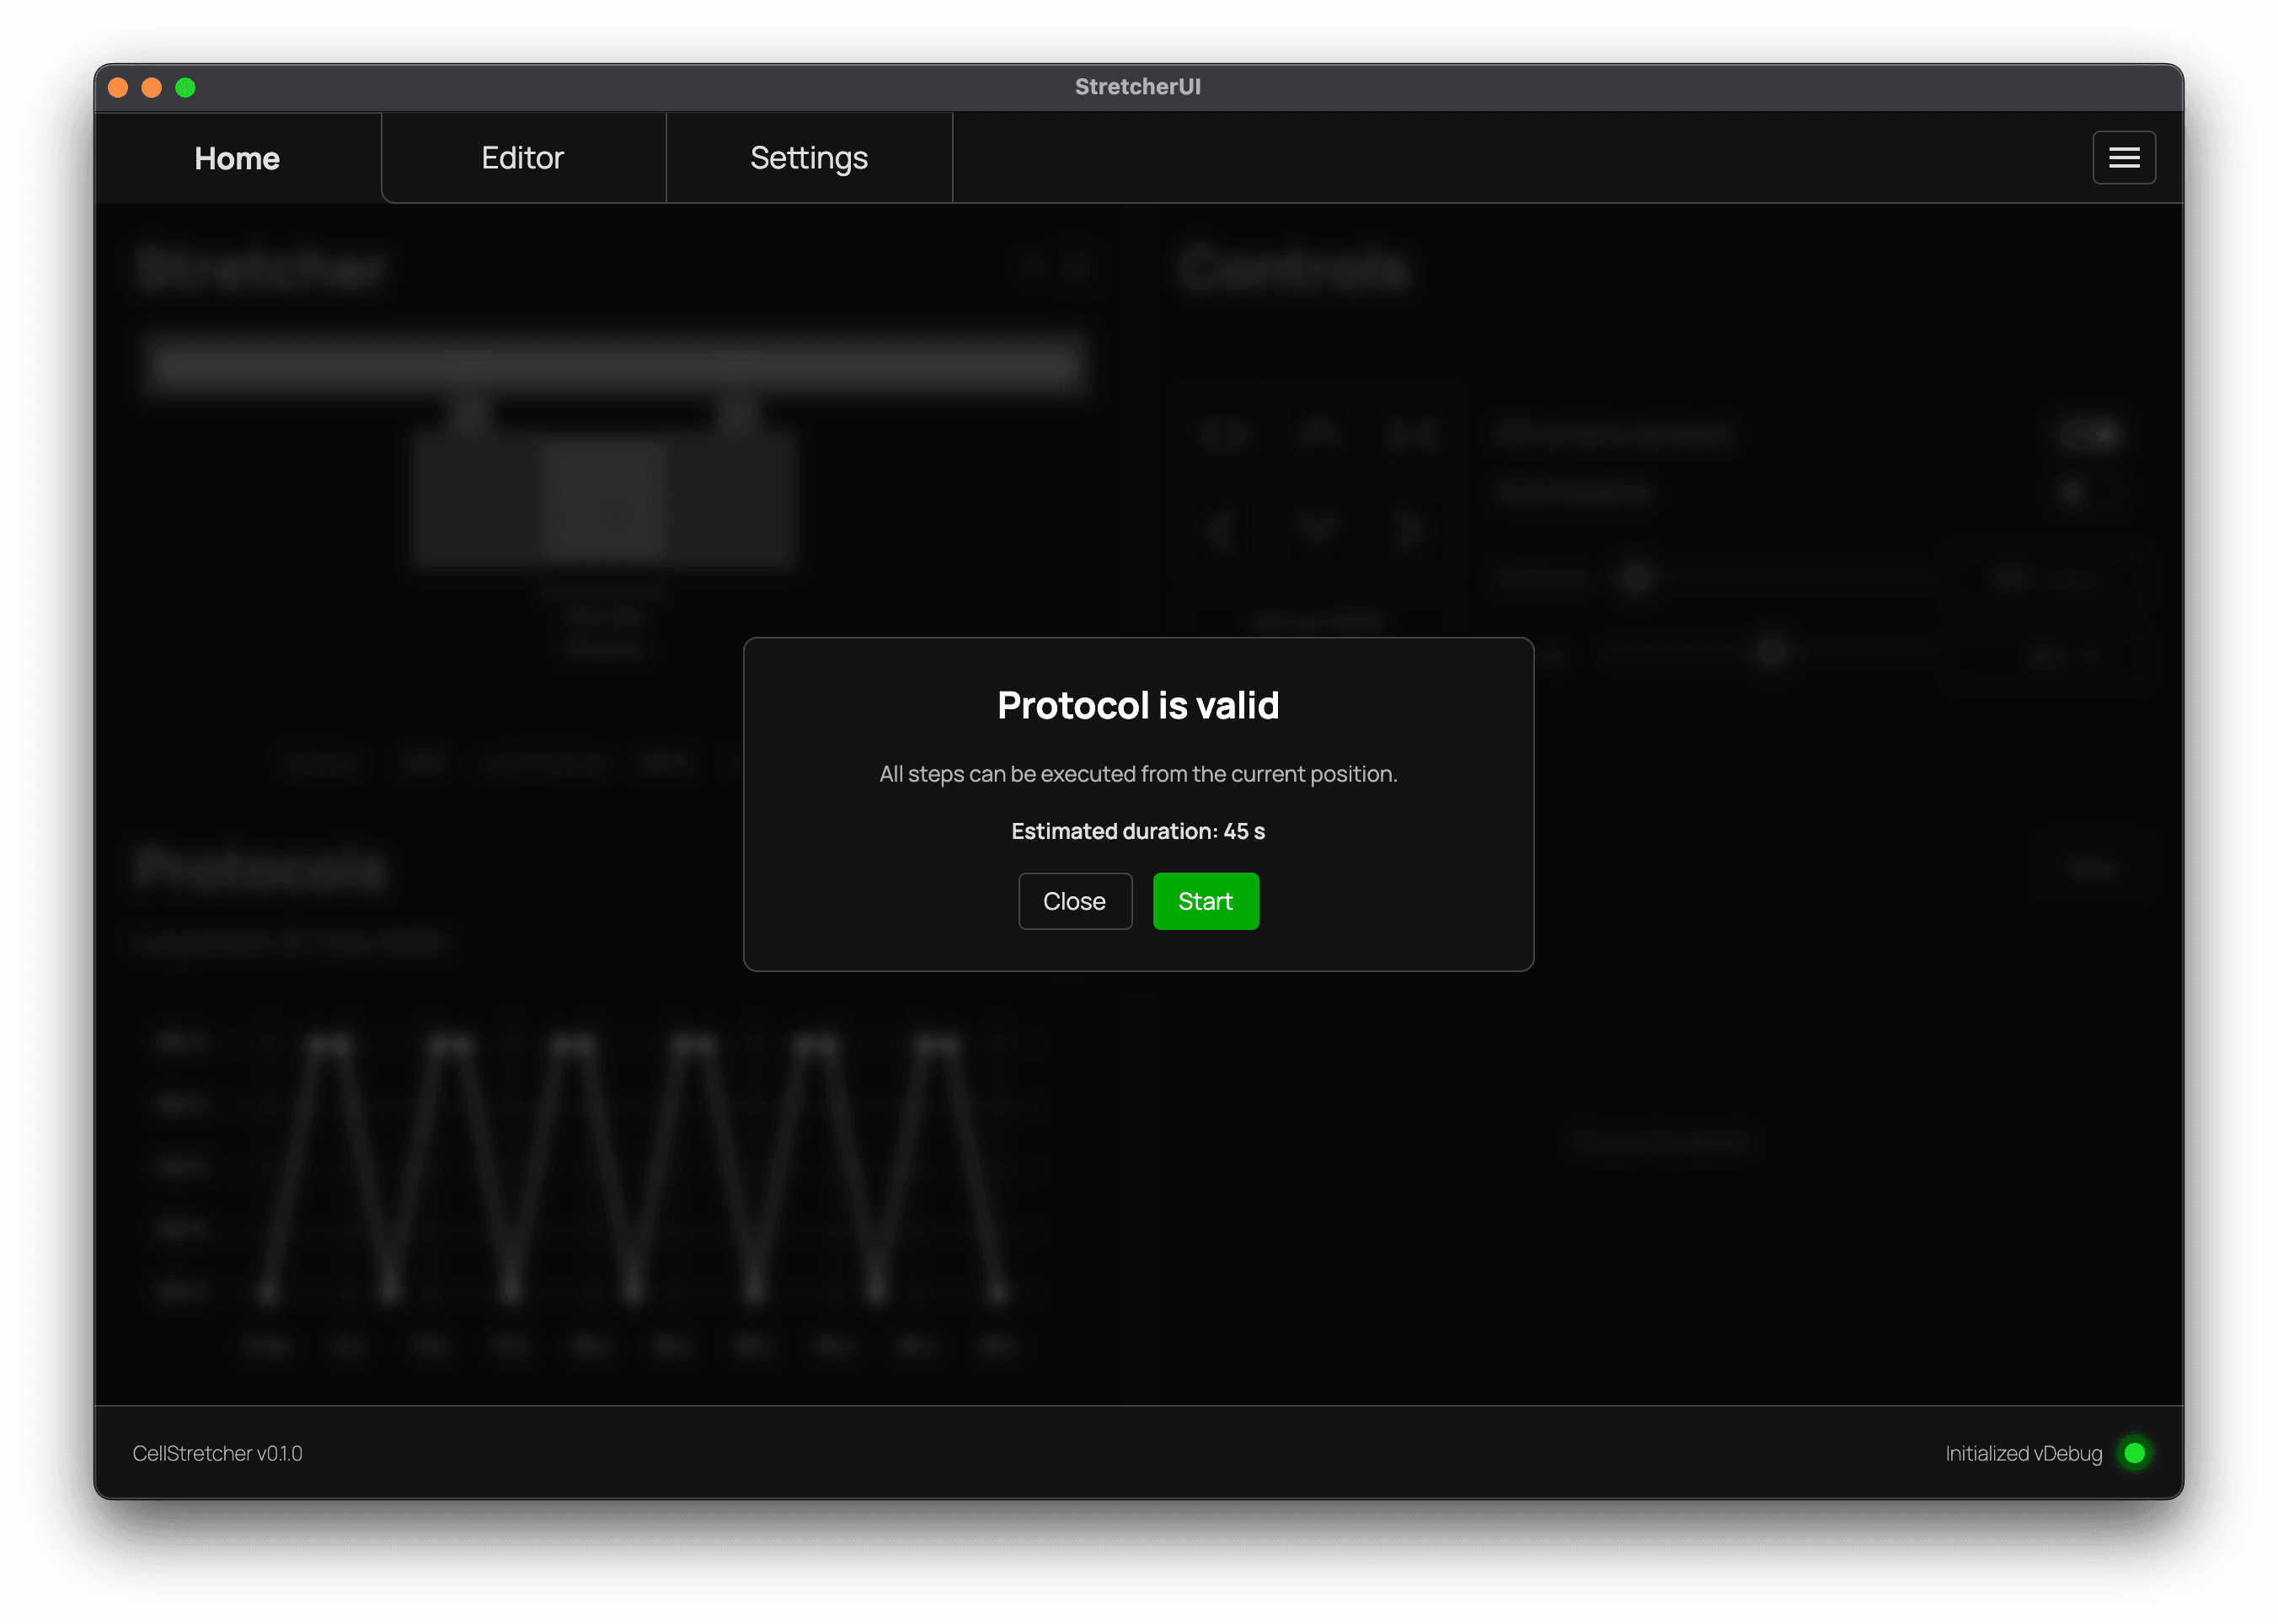
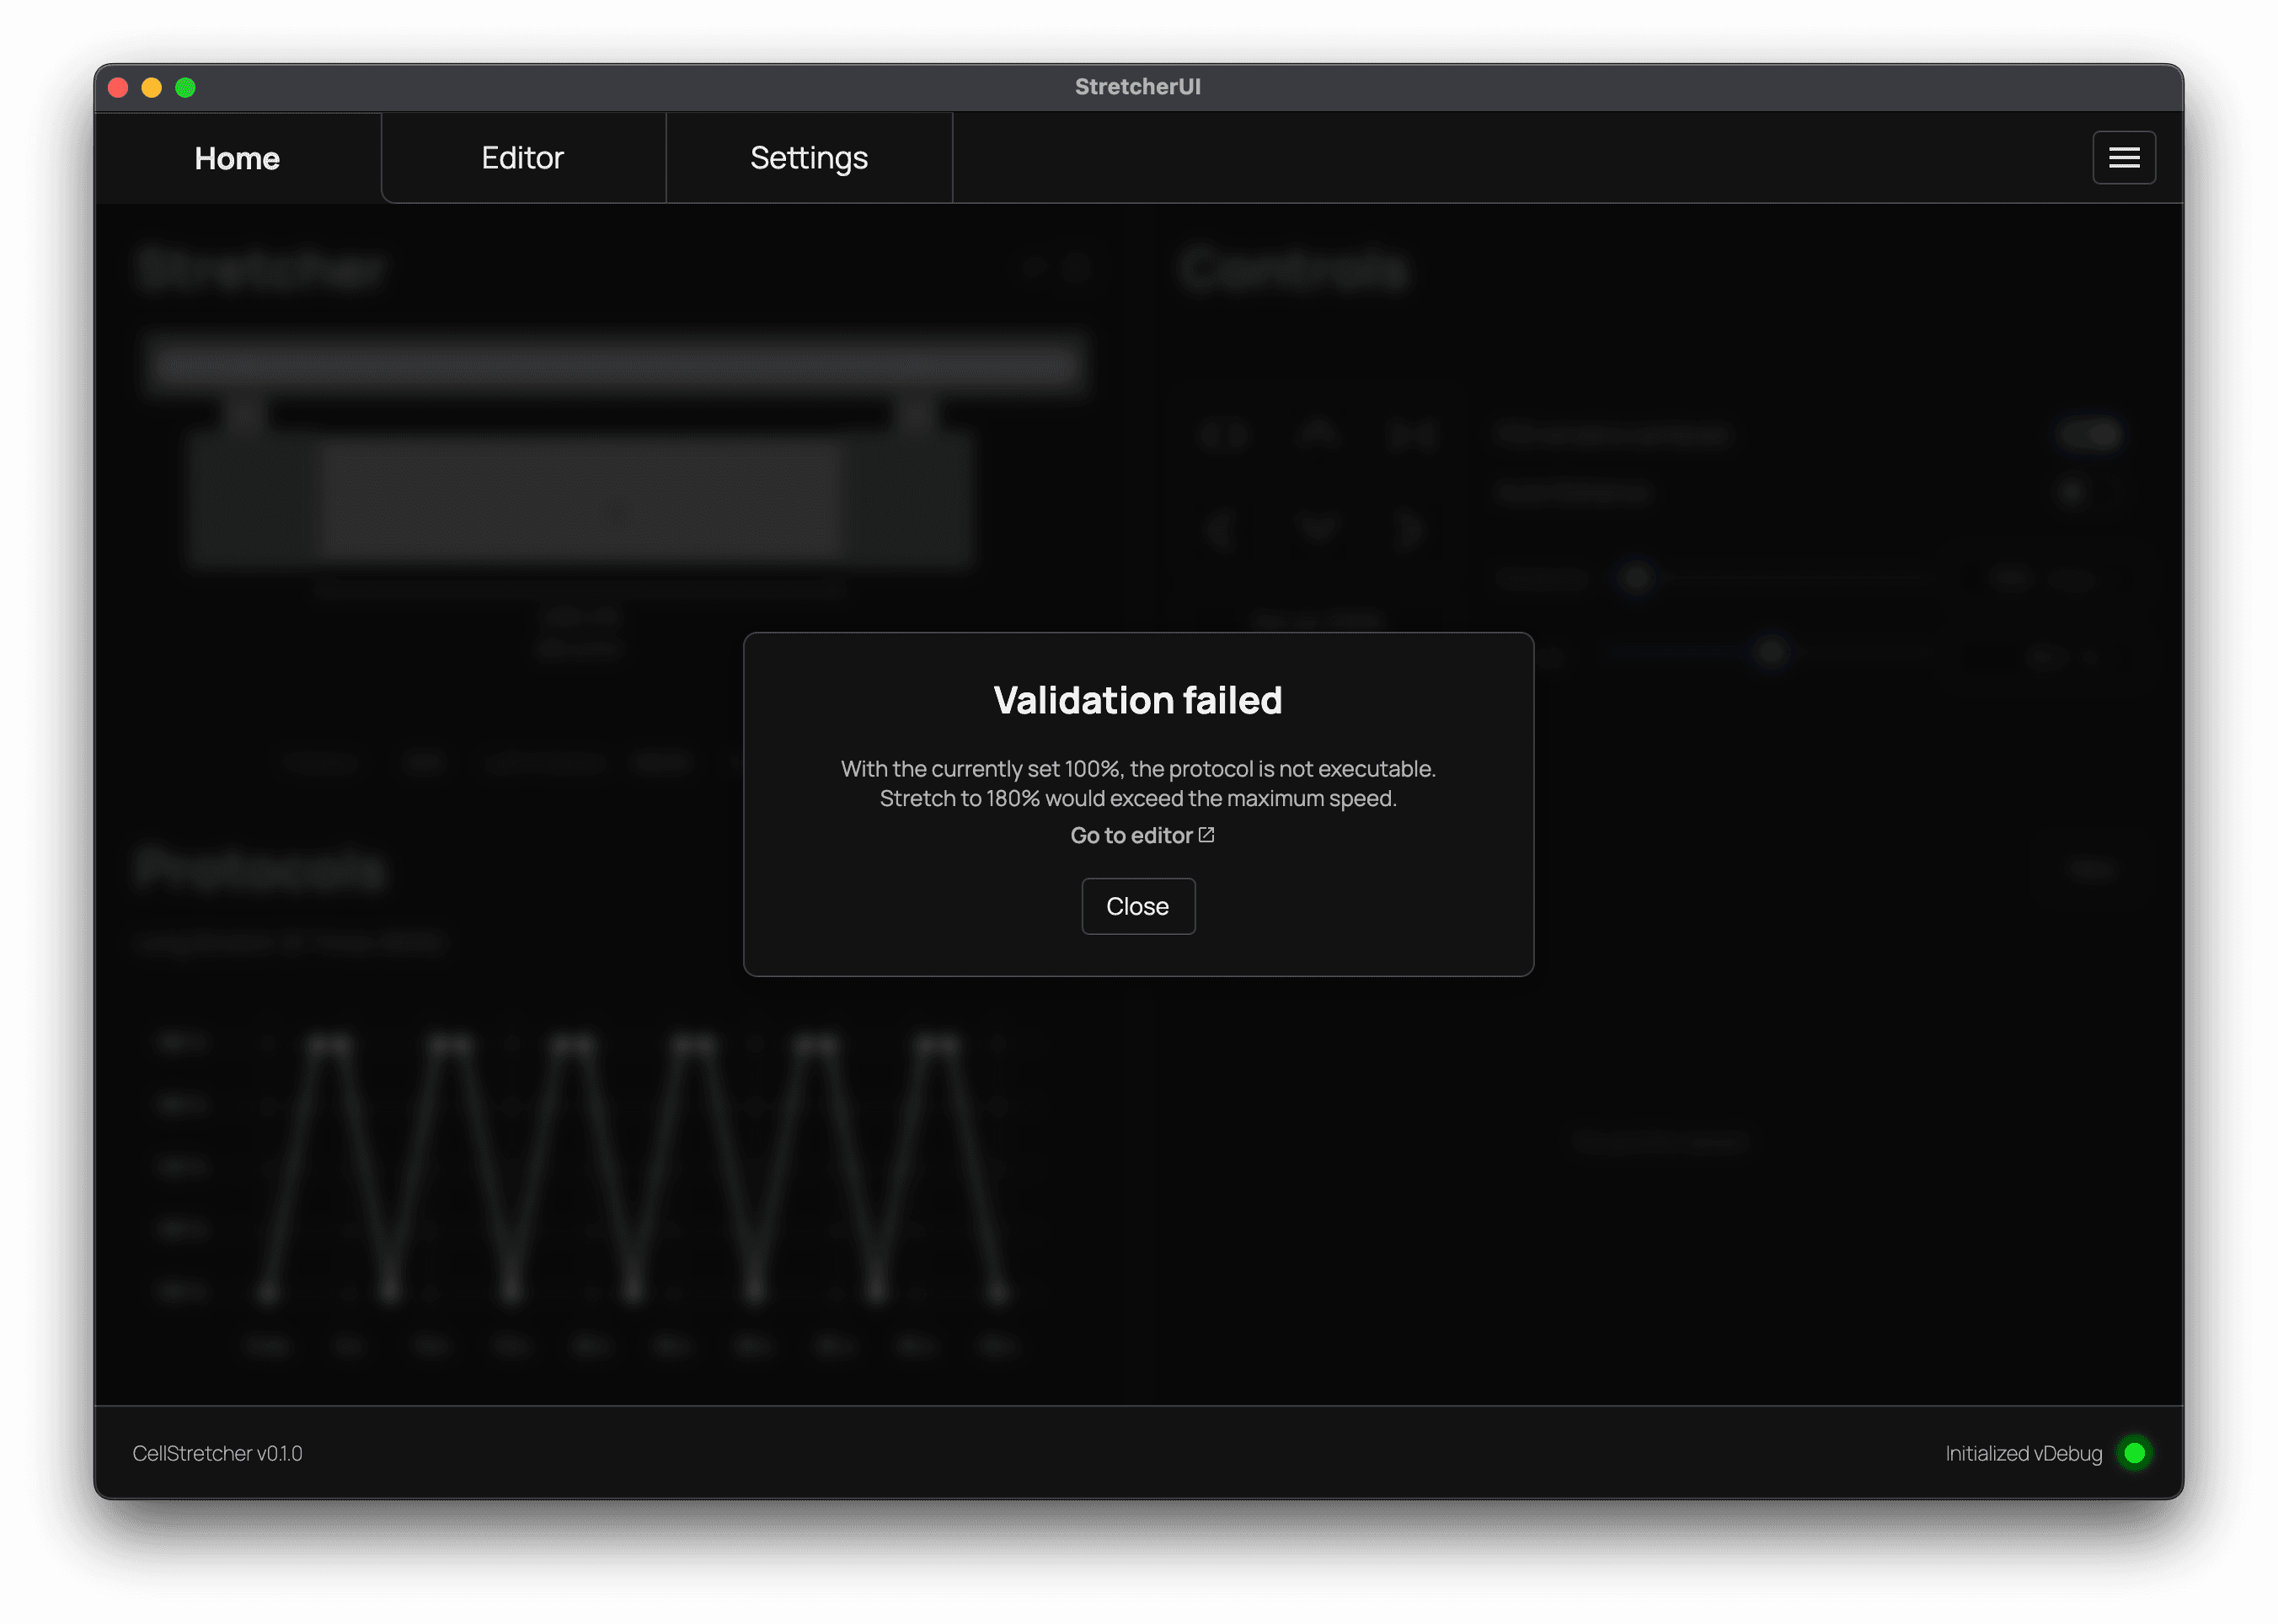
To start, press the "Play" icon button. This triggers a validation based on the current position of the stretcher. The result is either a success dialog, indicating that the protocol is ready to execute, or one of the following issues, each explaining that the protocol:
- would contract beyond the minimum position
- would stretch beyond the maximum position
- would take longer than the device allows
- would exceed the minimum speed
- would exceed the maximum speed
- would bring the arms too close together
- cannot complete both axes symmetrically
Running the protocol
If your protocol is valid, you can see the estimated execution time and press "Play". The "Play" icon button is then replaced by a "Pause" and a "Cancel" button, each of which takes effect after the current step has finished. If you need to stop immediately, press the bound Stop shortcut.
What happens if the device is at e.g. 160% when starting?
Protocol stretch values are always evaluated against the set 100% reference. So if the protocol says to stretch to 160% and the device is already at 160%, the first step will not move the stretcher. After that, it functions normally. When this happens, a warning is shown in the protocol's starting dialog.