Shortcuts
View and customize keyboard and controller shortcuts.
The "Shortcuts" panel lets you bind the most common actions to a keyboard key and a controller input. Each action has two columns, "Keyboard" and "Controller", and can be bound to one, both or neither.
How binding works
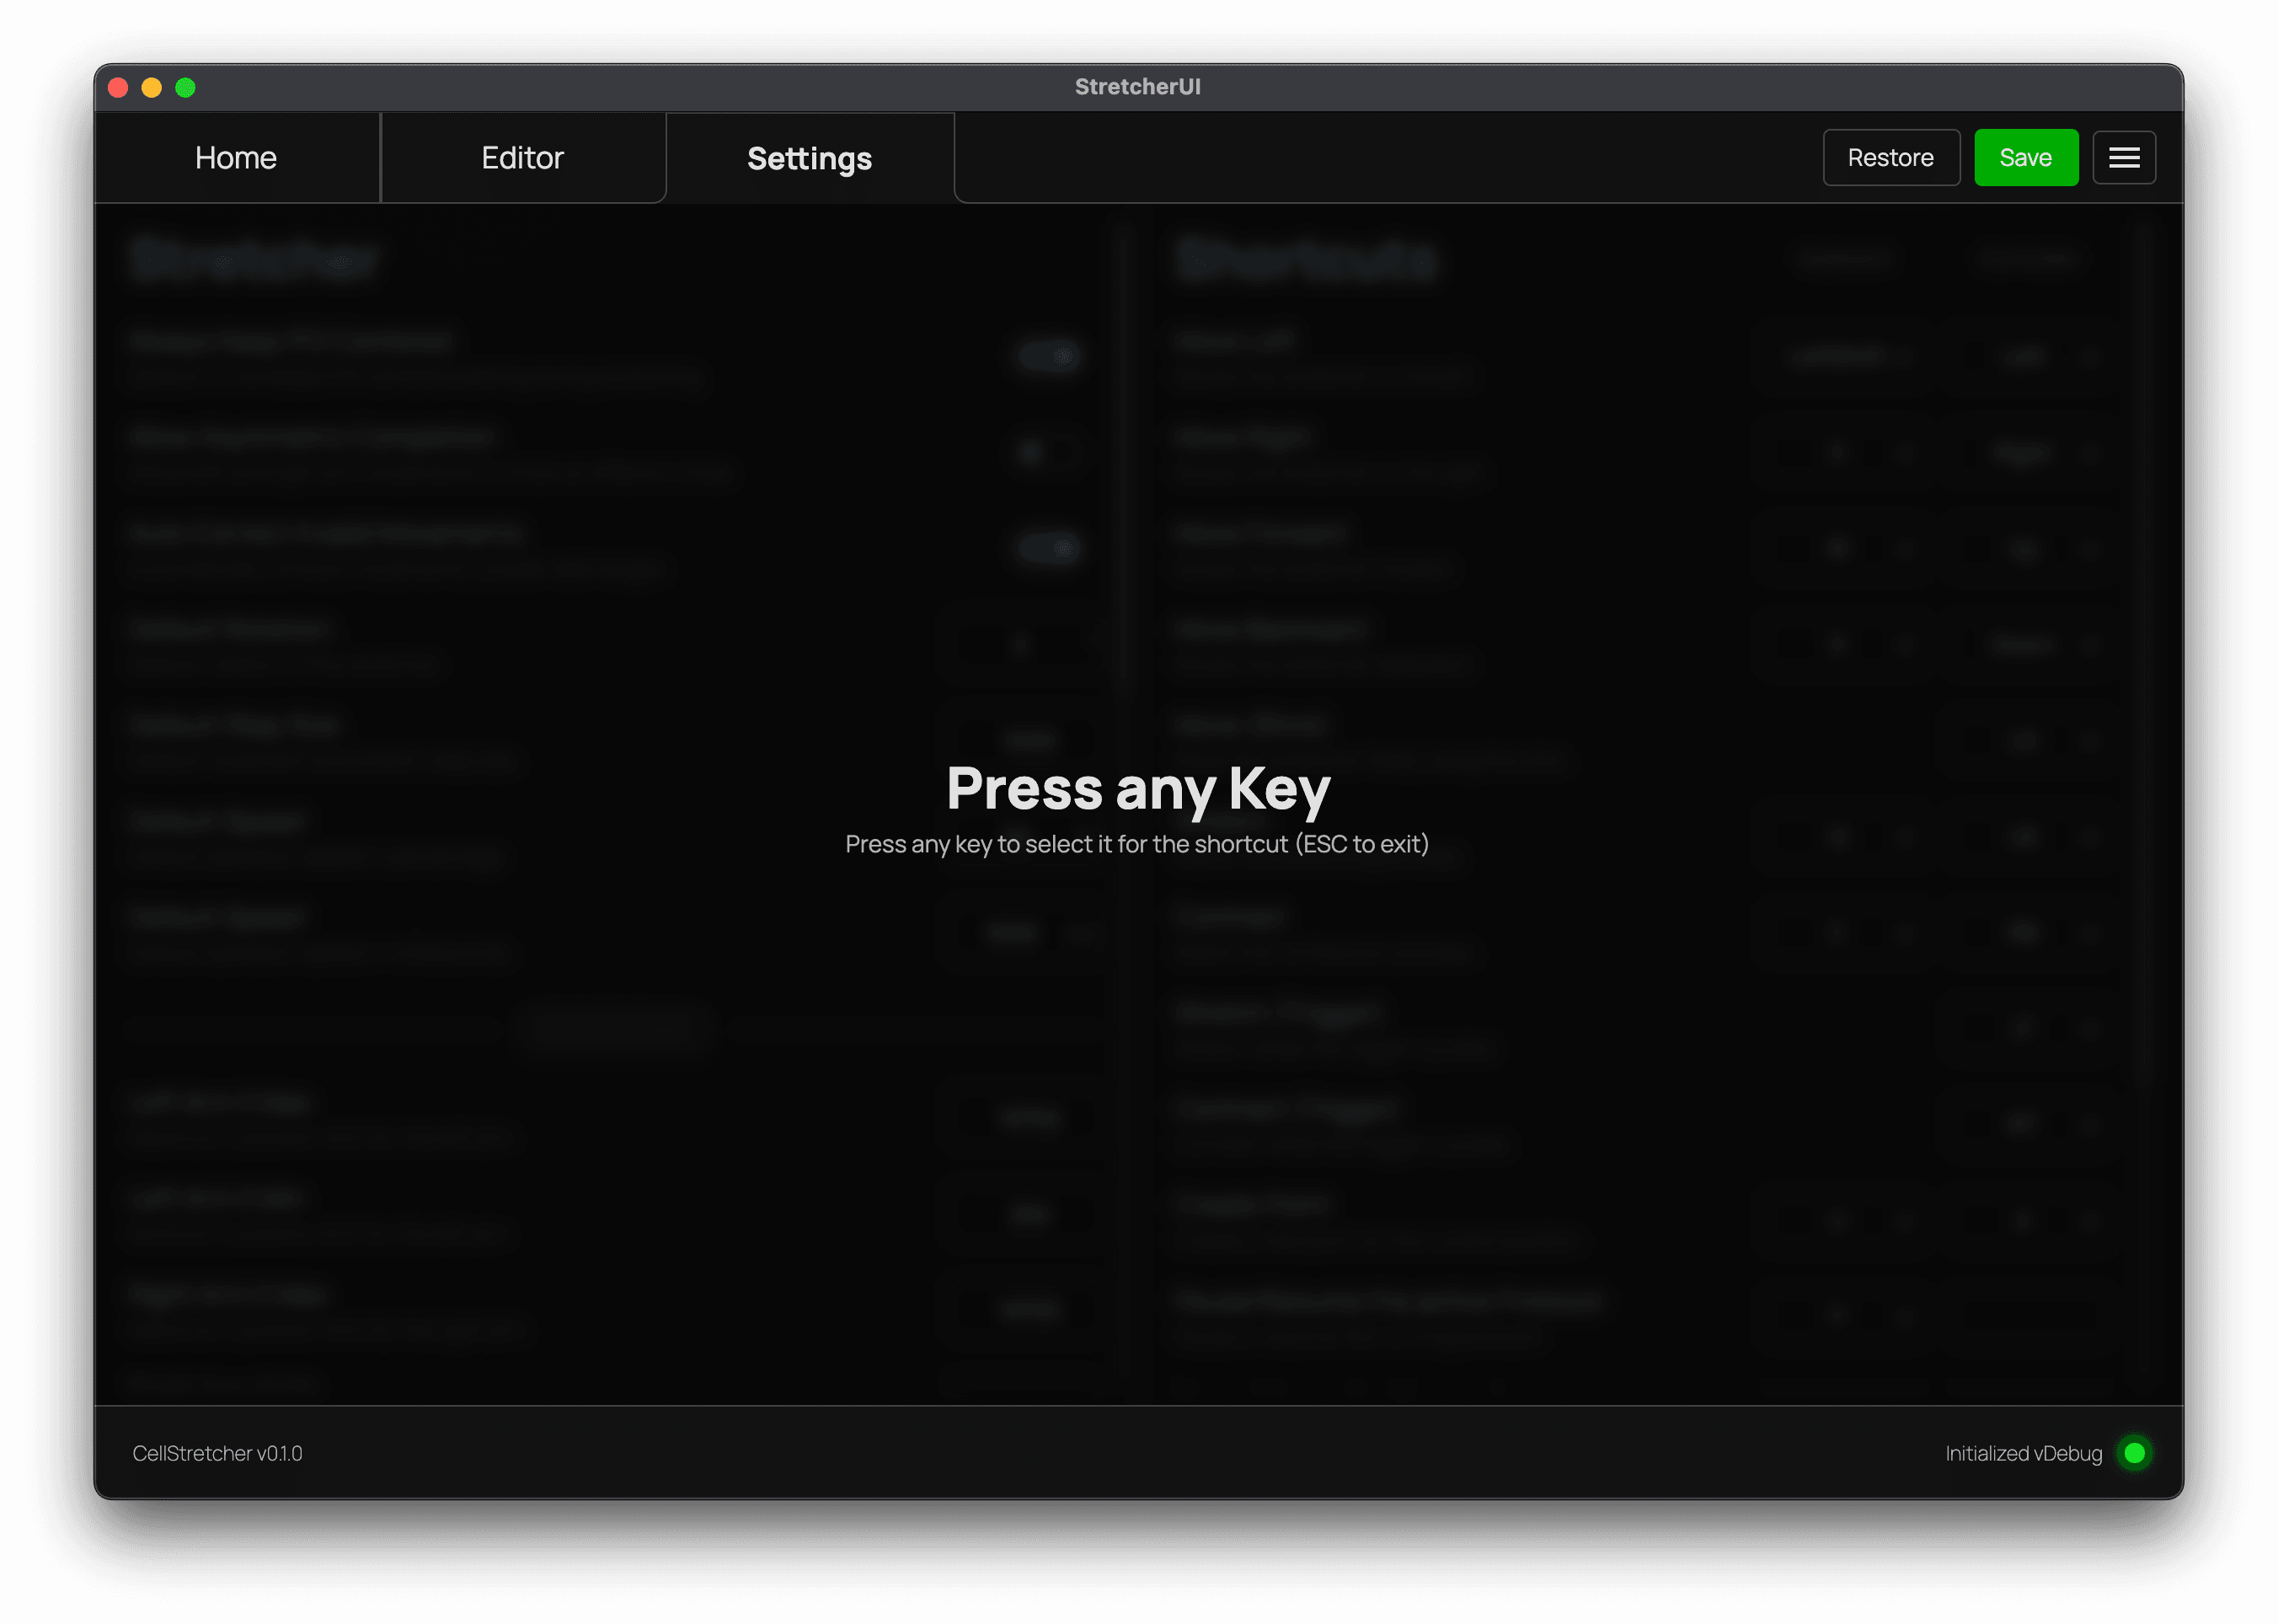
Click the keyboard or controller cell of an action to start binding it. A capture overlay appears and waits for your input: "Press any Key" for a keyboard binding, or "Press a Button", "Move a Stick" or "Pull a Trigger" for the matching controller input.
The next input you give is captured and assigned to the action. Press ESC to
leave the overlay without changing anything. To bind a controller input, the
controller has to be connected.
Removing a binding
An action does not need a binding. When you remove one, the action simply has no key or controller input assigned to it anymore, and triggering it that way no longer does anything.
To remove a binding, use the broom button next to the keyboard or controller cell of the action. The button only appears while a binding exists.
Available shortcuts
A few actions are controller-only: "Move (Stick)" and the two trigger actions have no keyboard equivalent. The table below lists every action with its default keyboard key and default controller input.
| Action | Description | Keyboard | Controller |
|---|---|---|---|
| Move Left | Moves the stretcher to the left. | A | Left |
| Move Right | Moves the stretcher to the right. | D | Right |
| Move Forward | Moves the stretcher forward. | W | Up |
| Move Backward | Moves the stretcher backward. | S | Down |
| Move (Stick) | Move the stretcher freely using the stick. | — | LS |
| Stretch | Starts the stretching process. | Q | LB |
| Contract | Starts the contraction process. | E | RB |
| Stretch (Trigger) | Stretch while the trigger is pulled. | — | LT |
| Contract (Trigger) | Contract while the trigger is pulled. | — | RT |
| Create Point | Create a new point at the current position. | U | A |
| Pause/Resume the active Protocol | Pause or resume the running protocol. | P | None |
| Cancel the active Protocol | Cancel the running protocol after the current step. | C | None |
| Set 100% | Set the current gap as 100%. | T | Y |
| Go to 100% | Go to the set gap of 100%. | Z | X |
| Stop | Stops the stretcher instantly. Reinitialization may be required afterwards. | Space | B |
The "Set 100%" and "Go to 100%" shortcuts are the equivalents of the buttons described under the 100% reference on the manual controls.